How to achieve perfect colour management on multiple substrates

A spectrophotometer and linearization plans are essential to maintain consistency and quality, say industry experts from EFI and Caldera.
Which substrates have you found the most straightforward to profile and why?
Michael Dreher, Director of Strategic and Technical Partnerships, Caldera: The most expensive ones! Why? Because usually they are produced in Germany or Austria. Those guys know their stuff and are capable of delivering the same quality for each batch of substrates they produce.
Chris Schowalter, Director of Market Segment Management, EFI: Adhesive film (polymer) is the most straightforward. It’s very good for mid- and long-term applications both indoor and outdoor. This kind of media has a long life period and form-stability.
For proofing I recommend microporous PE (polyethylene) coated paper with a white point close to the reference e.g. FOGRA51. This enables proofing without paper white simulation. With this kind of media you can cover a very wide colour gamut, which is important for spot colour proofing.
What are the most important considerations to achieve common colour appearance (given the wide variety of characteristics found in wide format media)?
Chris Schowalter, EFI: The following items are important/helpful:
- A similar white point
- A similar amount of optical brightener agents (OBAs)
- Gloss of the media
- Use strong black generation to minimise metameric effects, in particular to stabilise the colour managed grey balance
- Similar gamut-mapping method for out-of-gamut colours (visual hue preserving)
- Gamut-map colours to “memory colours” like blue sky, green grass (this is image enhancement processing rather than colour management)
- Preserve skin tones
- Blackpoint compensation (to utilise most of the printers’ dynamic range in lightness).

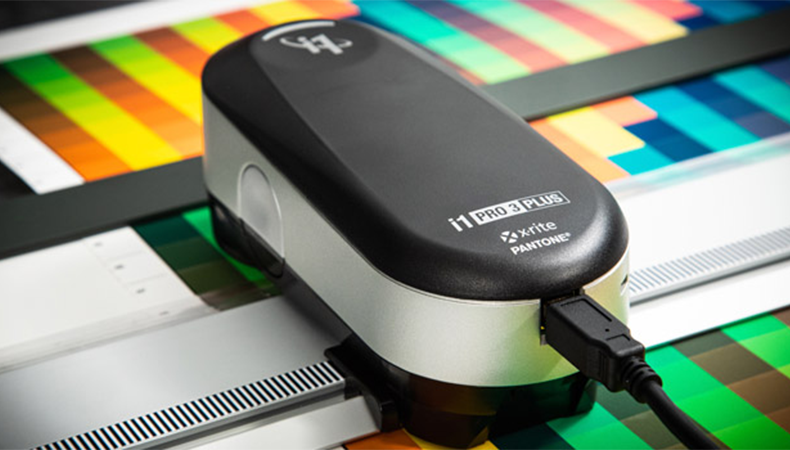
The X-Rite i1Pro 3 Plus spectrophotometer is designed for use on substrates such as textiles, corrugated and ceramics
What do you consider to be the key challenges addressed by your software?
Chris Schowalter: Accurately characterising printing systems with their various options (printing resolutions, colour configurations, media types, and so on) and their integration to ensure maximum colour fidelity for many applications.
At EFI we are able to combine the best of two worlds. We allow the user to perform optimisations (iterations) of a colour reproduction without ever having to leave the world of industry compliant ICC colour profiles.
Michael Dreher: We have the possibility to drive multiple spectrophotometer devices so, depending on the substrate used, we can optimise the colour output to reach common colours appearance.
With reference to measuring equipment, which type of spectrophotometer applies to which media group and where would a colorimeter or densitometer have value?
Michael Dreher: You need to choose the right spectrophotometer depending on the substrate you want to use for your production: “If I want to play football on grass, I will need studded shoes.” It is the same story with the spectrophotometer. If I need to calibrate transparent substrate, I need to get a spectrophotometer compatible with transmissive reading. If I need to calibrate a textile, I will need one with specific reading aperture (8mm for example).
Spectrophotometers have the capability to read in Spectral and Lab mode. There is no need to buy an extra measuring tool.
If I want to play football on grass, I will need studded shoes. It is the same story with the spectrophotometer
Chris Schowalter:
Backlit applications: spectrophotometer with transmission support.
Media with OBA:v spectrophotometer with M1/M2 support.
Textile media: spectrophotometer with big aperture size recommended.
A spectrophotometer can be used to measure optical density the same way a densitometer does, so I see no need to use a densitometer whenever a spectrophotometer is available. In general, a densitometer is a good tool to compare the ink thickness of two prints or print processes that use the same ink. Since in digital printing this is usually not the case (to have the same ink (and only one per colour) a densitometer is not useful.

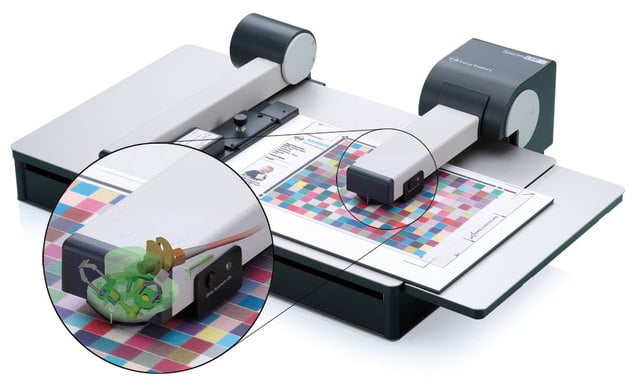
Variable aperture Barbieri spectrophotometer: 2mm for photographic, 6mm for UV inkjet and 8mm for textile
How do we assess inter-instrument agreement and its impact on tolerancing? How can you ensure consistency through calibration?
Michael Dreher: Spectrophotometers need to be calibrated by the manufacturer after a certain number of months. They propose a maintenance program to recalibrate their device and to ensure colour consistency. Some RIP software like ours has the capability to warn the customer when the device needs to be re-calibrate. It is mandatory.
Chris Schowalter: This is a science in itself and it is difficult for a manufacturer to give recommendations here. I usually recommend that the used instruments are tested and therefore a specific inter-instrument difference is established. The tolerances that are used for process control have to be chosen bigger than the inter-instrument agreement. This will show rather quickly if a normalisation to the same instrument model is required. Usually that is quite beneficial.
We calibrate each measuring device individually before measurement using the vendors’ calibration standard.
How do should we decide which measurement illumination condition to use, i.e. M0, M1, M2 or M3?
Michael Dreher: In accordance with the ISO 13655 standard, the “M” series of measuring mode settings was defined in order to standardise illumination conditions where OBAs are utilised in substrates.
-
M0: “Colour measuring mode A” spectral luminance factor without polarization filter under a light source that simulates standard illuminant A.
-
M1: “Colour measuring mode D50” spectral luminance factor without polarization filter under a light source that simulates standard illuminant D50 with correct UV component <400 nm (the most commonly used).
-
M2: “Colour measuring mode UV Cut” spectral luminance factor without polarization filter under a light source that simulates any standard illuminant without UV component
-
M3: “Measurement with polarization filter” spectral absorption degree (with RGB filters) or spectral luminance factor (with spectral scanning head) with polarization filter pair (in radiated and in reflected light, crossing each other) under a light source that simulates any standard illuminant.
Chris Schowalter, EFI: It depends on the following:
-
The amount of OBAs in the media
-
Which measurement condition was used for the reference profile
-
Measurement of wet or dry print colours
-
The final viewing environment and application type.
What is the importance of linearization and ink limiting before profiling?
Michael Dreher: It is the basis of colour management.
You need to define the ink quantity that the substrate can handle per ink channel. Then you can mix the inks together and define the max ink limitation. When you are done, when you know how much ink your substrate can handle and how fast the ink can dry, you can start the profiling step. Of course, you need to use a RIP software to do this. It becomes a real plus when you will need to build profiles for multiple substrates on multiple printers.
Chris Schowalter: The linearization and the ink limiting before profiling is a very important step, because the linearization achieves a linear relationship between the printed ink and the visually perceived colour. The scale to measure this relationship typically is colour difference.
The ink limiting is also helpful to optimize the ink amount related to the media and you can stop when additional ink does not result in a significant colour change in colour. This makes the linearization process a little easier as the area of interest (where the colour changes significantly) is sampled more accurately.
Applying a (total) ink limit also helps to avoid unwanted printing artifacts due to ink excess, such as:
-
Flooding, bleed through (low viscous/highly fluid inks)
-
Fringing, speckling, mottling, coalescence
-
Media wrinkles
-
Ink layer too thick (UV inks)
-
Curing issues (UV inks)
-
…and to reduce/optimise drying time for water-based inks.
What would you see as the principal benefits of well-executed colour management?
Michael Dreher: The possibility to match multiple colours on different substrates, with different inks and different print technologies, at different print speeds.
Chris Schowalter: The principal benefit of well-executed colour management is controlled conversion between the colour representations of various devices with different colour gamuts to ensure visual colour consistency and reproducibility.
In addition, a high-precision CMM and high-quality ICC profiles in combination with a high-fidelity RIP ensure maximum colour quality, such as printing smooth gradients/vignettes without visual artifacts and a colour gamut with maximum dynamic range in both colour and lightness.
Become a FESPA member to continue reading
To read more and access exclusive content on the Club FESPA portal, please contact your Local Association. If you are not a current member, please enquire here. If there is no FESPA Association in your country, you can join FESPA Direct. Once you become a FESPA member, you can gain access to the Club FESPA Portal.
Topics
Recent news

The personal touch: visit Personalisation Experience’s SmartHub Conference 2025
Join the SmartHub Conference at Personalisation Experience next month to stay ahead of the latest tech and trends.

How to build brand trust using customer reviews
Reviews can benefit or damage your business’s reputation. From spreading the word to social proof, here is why reviews matter and what you can do to manage your customer reviews to improve your brand’s reputation.

Regulation guidance: Extended Producer Responsibility
Extended Producer Responsibility (EPR) is now in effect. What does it mean for those in the print industry? Sustainability consultant Rachel England outlines everything you need to know.

How to maximise the automation of your production workflow
Workflow automation has evolved beyond basic file prep, now encompassing job submission, prepress, and postpress. Printers automate to boost productivity, cut waste, and address skill shortages. Implementing tailored automation, from RIPs to MIS, optimises throughput and profitability, minimising human intervention.